Wednesday, July 2, 2014

#waterrevolution

So while browsing (aka buying everything that looked even remotely cute and useful) at Target I decided what I really needed was a portable water bottle with the filter already in it. I mean what could be better than filtered water without the extra step of having to pour it from a container or use a disposable water bottle? NOTHING!! It is arguably one of the greatest inventions since sliced bread.

At first I figured I would go with Brita they are a good company and their water jug has yet to steer me wrong. But while perusing the area surrounding the Brita's I came across the bobble water bottle.

Most of you are probably not unhip graduates like me and have probably seen these things all over the place but I fell in love at first sight with these adorably plain little bottles. I love that the filters are a while different mouth piece, thus eliminating the concern of what could be growing in all those little crevices. The hard yet pliable material makes carrying it so much easier. Not to mention its curvy like the shape of a woman. This should instantly say "hey I was made to look like an hourglass to help you attain that hourglass!" But seriously if that is not one of their slogans it really should be.

The only draw back to these marvelous creations are that the mouth piece is really small so getting a normal sized ice cube in there is kinda hard, but luckily the amazing geniuses who invented this gift also made special ice cube trays to make ice that fits perfectly! While those are still waiting to be delivered and tried out, I will say if you like to drink refreshing, filtered water I highly recommend getting one of these. They are cheaper than a Brita and come in way better colors that you can change up whenever you change your filter!

So look it up and try one out for yourself. I promise you won't be disappointed!
 
Right now I just have a clear one with the black filter but I bought some hot pink filters to replace it so in two months time the black part will become hot pink!! I think that is awesome considering I am constantly changing what color I favor. This way I don't have to commit to just one for very long!
 
To buy your own check your local Target or go to:


Monday, June 9, 2014

Sometime Life is Almost too Perfect

So my life is pretty much going perfect right now and not gonna lie it scares me a little. Things don't go perfect in my life. I am the one who messes up, picks the wrong guy, comes on too strong, gets cheated on or just basically goes crazy white chick and is so insecure that I drive guys away. But this time none of that is happening. In one week I will officially be dating my boyfriend for a year which is amazing since that is normally my cut off. 

The one year mark, for me, means a serious commitment. If you stay with that person past a year you are choosing them, you see a future with them, you want a future with them. Usually by one year I find all the flaws and either act so crazy that I become a huge mess and break up with him. This usually leads to crazy parties, drunken times and the occasional random make out session with whoever is looking good at the time. 

But right now I don't feel any of that. I don't worry that he is going to cheat or that I am going to cheat or that something is going to go wrong. Everything is going right. We mesh so well, and both our families are amazing and all my friends love him. 

So why am I waiting for the other shoe to drop? For something to mess up? For me to mess up? Guess all I can do is suppress my crazy and pray that that other shoe is a very old and thin flip flop that doesn't make a splash in my life.

Tuesday, December 31, 2013

Monday, December 30, 2013

Just a hint of sparkle

Part of being a girl and applying makeup is having all kinds of brushes. Whether they be for powder, bronzer blush or whatever for some unknown reason I find that storing these in a drawer to be gross. This is probably in part to them being dirty with makeup and I hate the idea of the drawer getting dirty and the brush just sitting in the filth, but I'm a weirdo.
So I decorated a small glass to hold all of brushes. It was super easy. I painted the outside a coral color. The best tip I could give is to allow time for each layer to dry before applying another because if you start painting while its still wet it will clump and look bad. After you get the look you like, I wanted a solid color so it took quite a bit of paint and time, I put it into a cold oven and set temp to 350 and started it with the glass inside. I let it bake for 30 min and then turned the oven off and waited several hours for everything to cool. Just to be extra save I applied two very light layers of modge podge as once everything was cool
My last step was to spray some aerosol glitter and let it dry. Than I filled it and it now looks gorgeous in my bathroom.
Finished product

Sunday, December 22, 2013

Christmas Gifts for the Co-workers

Since Christmas is coming this means that I can use gifts as an excuse to craft. Unfortunately this means that most of my posts must wait until after Christmas to be posted but as far as I know my coworkers don't know or follow my blog meaning posting their gift should be safe enough and I don't need to worry about being discovered.

This year I had some difficulty coming up with gift ideas because I wanted something that was personalized but not too cheesy. Last year I got everyone a cute coffee mug (that I found at dollar store) and I filled them with little goodies. I bought pocket Kleenex packs, some hand sanitizer, candy (because everyone likes something sweet) and a packet of hot cocoa. I thought about doing something similar this year but I did not want to be redundant, plus with all the great gift websites I was sure that I could come up with something.

I began to think and one thing that my work is missing is cute little name tags for our desks. Not that they are truly needed since we are a pretty small business office, however it was something that we have joked about needing in the past. So I decided a cute, quick and cheap gift would be name tags or desk plates. My first stop, as with most of my craft projects, was Pinterest however I quickly found that most of the pins were for desk plates that are sold on etsy and although they are adorable, I was looking for something cheaper. Inspiration struck while I was perusing my local dollar tree and I came across some small picture frames. I figured that these would make the perfect name plates because I could decorate them the way I wanted and the people could change out the picture on the inside if they truly did not like what I came up with. Plus it helps that they could be used to sit on their desk or hang it up on a wall or board to avoid taking up desk space. I am not sure about anyone else but I hate having things just sitting on my desk, maybe that's my OCD/organizational side coming out but at work if I can hang it I do.
The frames I used from Dollar Tree

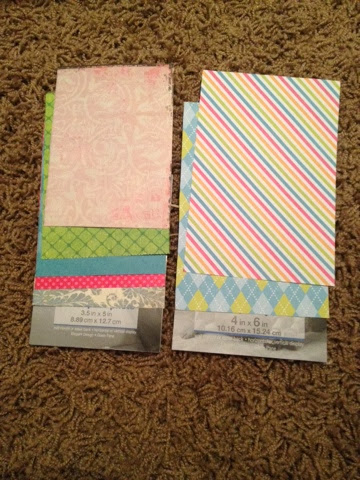
Now that I had the basic structure of my name plate down it was time to make it pretty. I started with the frame. I decided to leave that alone since I wanted to go crazy on the inside, plus again, if people wanted to reuse the frame for something else that is easier if it is just a plain normal frame. Since the frame was so bare I needed to spice up the inside of it. I found some cool and different fonts online and used those to spell out everyone's name. I really wanted to make this a more personalized gift so taking the time to make them all slightly different I think accomplished this. I than traced the person's name on a piece of cute and funky scrapbook paper, put them in the frame and voila an instant name plate.
See pictures for more complete details.
Cut the Paper to the correct size of the frame
Using tissue paper trace the name from the screen onto the paper
Place tissue paper over scrapbook paper
Trace image using a sharpie to transfer from tissue paper to scrapbook paper
What it looks like after transferring. I used a sharpie to darken the image
Finished project.


I also baked some cookies to place on top of the picture and wrapped them with a pretty bow to make it a complete gift, and of course add to the adorableness because I wanted the outside to look as adorable as the inside.

Sunday, December 15, 2013

Storage made adorable

Keeping with my bathroom theme, my next project was the drawers that I use to store makeup. I had bought a black plastic set of 5 drawers. I love storing my makeup this way because I could divide the different aspects and layers of makeup. For example, foundation, powder, blush, face primer and things of that nature are in the top drawer. The second drawer contains my eye shadows, the third the mascara and curler, fourth odds and ends like mirrors and fifth has hair ties and bobby pins.

I bought a black one to make it look a lot cleaner and nice than the plain white ones. It also had the added bonus of being very hard to stain or look dirty because it's black! However, I still wanted to spruce it up and help it to fit better with my bathroom colors and design. I figured the easiest way to add a little color to my storage would be the paint the drawers. Originally they were just the clear plastic. Although they were thick enough that you couldn't see what's inside them, unless you were really looking, they could still use a little color to spruce them up.

It was a simple fix as well. I just took the drawers our and wiped them down to make sure there wasn't any dust or makeup or anything else that would make the paint appear bumpy or not stick as well to the actual plastic. I than used plain acrylic paint to color my drawers in similar colors to both my shower curtain and the canvases I had recently completed (see previous posts). After several coats of color I applied a few coats of modge podge. Since these were functional pieces as well as decorative I didn't want to worry about the paint chipping or smearing or anything as I used them. I also only painted the sides of the drawers and didn't worry about the bottom since the bottom wouldn't be seen unless the drawer was in use and pulled out.

After everything had dried I replaced the drawers into their proper places. I love the look and the impact that they had on making the plain plastic storage look a lot nicer, however the plain black top of the container now looked too plain for my taste.. Using a stencil and some white paint I applied a cute little design to the top and also sealed that with modge podge.

My drawer was now complete and ready to look cute on my bathroom counter.

After everything is painted.
Sitting in my bathroom with my brush holder (tutorial to come)

Get Naked

As you can probably figure out by now Pinterest is one of my favorite websites. In fact, if I could only choose one type of social media to use for the rest of my life it would be Pinterest. Considering my crafting addiction it's pretty easy to see why. One day during a perusal of Pinterest I found this adorable chevron print sign that had Get Naked written rather largely on it. I immediately fell in love and knew that I needed to make one to go in my bathroom. Cause lets face it what could possibly be classier and cuter with my inspirational beauty quotes than a sign telling you to remove your clothing?


Off to hobby lobby I went for supplies. Luckily I had plenty of bright colored paint, from my earlier bathroom art creation, so all I really needed was a canvas. I decided to stick with the rectangular one that was in the picture I found, partly because I thought that the spacing on the rectangle was adorable and it would look awkward in a more square pattern, but also because above my toilet I had a rectangle shaped piece of wall that the sign would fit perfectly in.

I abandoned the chevron print, partly because I could not get the spacing right where it did not look awkward and weird, and partly because once I had the print drawn I realized that it looked too busy and clashed with my paisley shower curtain. I decided to go with a much simpler and cleaner diagonal stripes. The plus to this was also that the execution of such would be easier. All I did was use painters tape to mark my stripes. I wanted to incorporate more of the colors in this wall hanging than in the previous one and the stripes helped to do that as well. I picked out four colors (the coral and yellow that was previously used) as well as a teal and gray. The teal matched a color that was also present in my shower curtain and the gray not only matched as well but had the added bonus of adding a color contrast to the other brighter colors. I don't know about everyone else but I always like when a light gray or brown or white is included with multicolored patters to balance them all out.

With my striped pattern laid out in tape, I simply alternated painting the open areas. The was the easy part since every other stripe was covered with tape I didn't have to worry about making my lines super neat, the tape helped do that for me. My only concentration was in making sure that I alternated my first two colors. This may sound easy but I assure you if you are like me sometimes you get a little distracted and can end up using the same color rather than switching. Thankfully I did this step in light yellow and teal thinking that the coral and the gray would be able to easily cover any mistakes made. After applying several coats of the first two colors and letting them dry, I removed the tape creating new white stripes. Since I did not want these to remain white, I painted the white areas with the two remaining colors. I now had a multicolored stripe pattern on my rectangle canvas.

Now it was time to apply the lettering. I made a copy of the wording on my computer with the font that I liked. I than placed a piece of tissue paper onto the screen and traced the image using a pencil onto the tissue paper. That traced image was than placed onto the canvas where I retraced the pencil marks with sharpie which bled through the tissue paper onto the canvas. I than used a paint pen to color in the image. After everything has dried it is time to hang it and enjoy!!!!